Εγκατάσταση και Εισαγωγή στο Arduino IDE
Install Arduino IDE
It currently has three programming tools for you to choose from: Arduino IDE 1, Arduino IDE 2 and Arduino Web Editor.
Arduino IDE 1 is the standard, offline editor.
Arduino IDE 2 is the future version the Arduino IDE which is faster and even more powerful.
Arduino Web Editor is an online development environment.
Arduino IDE 1
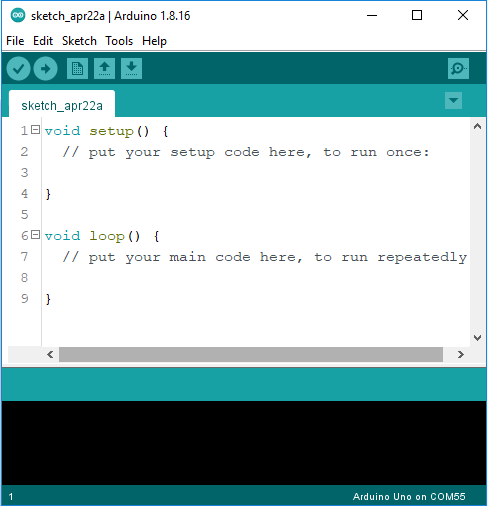
The Arduino Integrated Development Environment - or Arduino Software (IDE) - contains a text editor for writing code, a message area, a text console, a toolbar with buttons for common functions and a series of menus. It connects to the Arduino hardware to upload programs and communicate with them.
You can find everything about Arduino IDE 1 from: https://docs.arduino.cc/software/ide-v1.
The following links are tutorials for the installation of Arduino IDE 1 for each operating system.
Arduino IDE 2
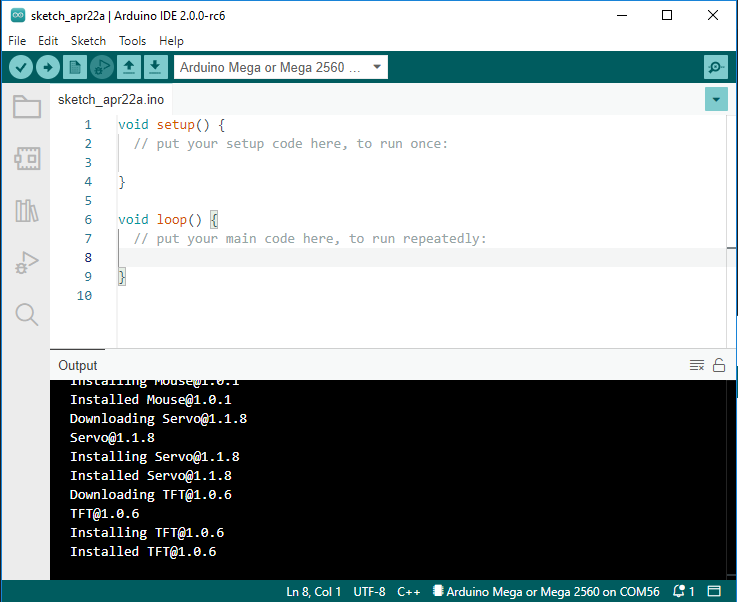
The new major release of the Arduino IDE is faster and even more powerful! In addition to a more modern editor and a more responsive interface it features autocompletion, code navigation, and even a live debugger.
You can find everything about Arduino IDE 2 from: https://docs.arduino.cc/software/ide-v2
Arduino Web Editor

Arduino Web Editor is an online development environment, with online storage and thousands of libraries available, and also supports new Arduino boards.
You can find everything about Arduino Web Editor from: https://docs.arduino.cc/cloud/web-editor
Introduce of Arduino IDE 1
Double-click the Arduino icon (arduino.exe) created by the installation process.

Then the Arduino IDE will appear. Let’s check details of the software.
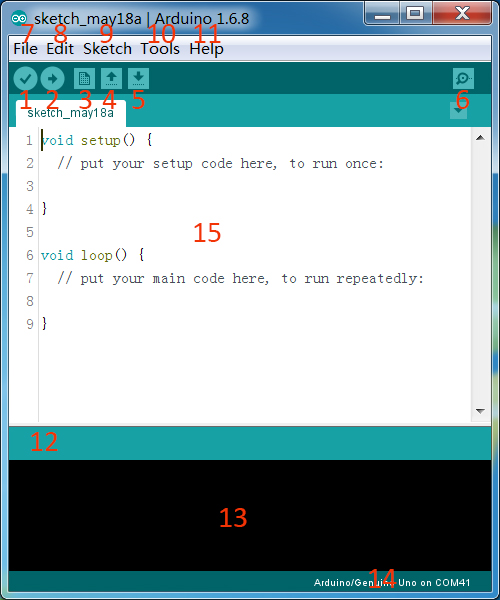
Verify: Compile your code. Any syntax problem will be prompted with errors.
Upload: Upload the code to your board. When you click the button, the RX and TX LEDs on the board will flicker fast and won’t stop until the upload is done.
New: Create a new code editing window.
Open: Open an .ino sketch.
Save: Save the sketch.
Serial Monitor: Click the button and a window will appear. It receives the data sent from your control board. It is very useful for debugging.
File: Click the menu and a drop-down list will appear, including file creating, opening, saving, closing, some parameter configuring, etc.
Edit: Click the menu. On the drop-down list, there are some editing operations like Cut, Copy, Paste, Find, and so on, with their corresponding shortcuts.
Sketch: Includes operations like Verify, Upload, Add files, etc. More important function is Include Library – where you can add libraries.
Tool: Includes some tools – the most frequently used Board (the board you use) and Port (the port your board is at). Every time you want to upload the code, you need to select or check them.
Help: If you’re a beginner, you may check the options under the menu and get the help you need, including operations in IDE, introduction information, troubleshooting, code explanation, etc.
In this message area, no matter when you compile or upload, the summary message will always appear.
Detailed messages during compile and upload. For example, the file used lies in which path, the details of error prompts.
Board and Port: Here you can preview the board and port selected for code upload. You can select them again by Tools -> Board / Port if any is incorrect.
The editing area of the IDE. You can write code here.